One of the great features of WPEngine is their Git push integration.
If you manage multiple sites on the platform, setting up multiple Git push integrations can start to conflict as they’re all at the same domain. But here’s the steps I’ve used to get it working whether it’s your first Git push or tenth:
Create a Local Copy of the Site
There’s a number of ways to do this, but essentially copying the files over from SFTP and the database either manually or with something like WP Migrate DB (Pro). VVV and vv together make it quick to spin up a new local WordPress site, or the now free Local by Flywheel.
Initializing Git
In Terminal, go to the root folder and start a new git repo with git init
WPEngine has a nice .gitignore file for including everything except core WordPress files, which will mess things up when pushed up to WPEngine.
You can either add and commit without pushing up, or create a repository on Bitbucket or Github to also push up to (in addition to WPEngine).
Create new SSH key
Use ssh-keygen -t rsa to create a new key. Name it the hostname of the WPEngine install you’re setting this up for, and save in ~/.ssh/
Add Public Key to WPEngine
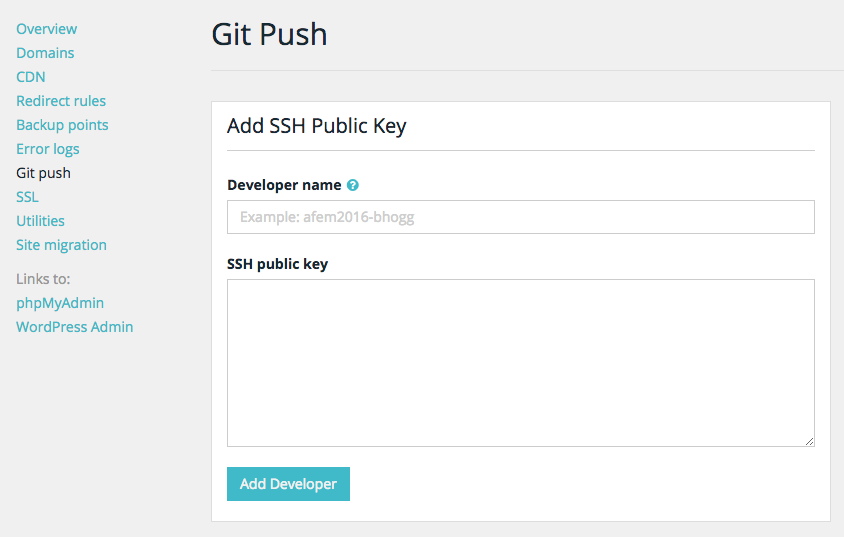
Login to the WPEngine account at my.wpengine.com, click the Install you are setting this up for, then select Git push on the left menu:

Paste in your public key and hit Add Developer.
Edit your ~/.ssh/config
To differentiate between any other WPEngine accounts you are managing, you’ll just need to add a few lines to your ssh config:
Host hostname
    User git
    Hostname git.wpengine.com
    PreferredAuthentications publickey
    IdentitiesOnly yes
    IdentityFile ~/.ssh/hostname
Where hostname is the name of your install.
Now you just need to add your production account as a new remote for git using:
git remote add production git@hostname:production/hostname.git
Again replacing hostname with the name of your install.
Now you’re all set to push to production with something like:
git push production master
Enjoy! You can see the rest of the Git push instructions at WPEngine.